How to Install Docker Desktop on Ubuntu 24.04
In this blog post, we will learn how to install Docker Desktop on Ubuntu 24.04 step-by-step.
The conventional way of running and managing Docker container images is on the command line. However, this can be a daunting prospect for beginners who are just getting started out with learning Docker. And this is where Docker Desktop comes in.
Developed by Docker, Docker Desktop is a free and user-friendly GUI application that allows users to easily run and manage Docker containers and images from their Linux PC without the need for executing commands on the CLI.
Docker Desktop is a cross-platform application which means you can install it on Windows, Linux, and Mac. It is free for companies of up to 250 employees beyond which you need a paid subscription.
Prerequisites
Before installing anything else, ensure that your PC meets the following set of basic requirements.
- 64-bit CPU with Virtualization Support enabled.
- At least 4GB RAM
- A GUI desktop environment (Preferably GNOME, MATE, or KDE )
- A Sudo User with admin rights
Now let us jump right in and install Docker Desktop on Ubuntu 22.04
1) Confirm KVM virtualization is enabled
To get off the ground, you need to ensure that KVM virtualization is supported. To check if the KVM module is loaded, run the command:
$ lsmod | grep kvm
If the module is loaded, you should get the following output. This shows that the KVM module for the Intel CPU is enabled.
If the module is not loaded, you can run the following commands:
For Intel Processors
$ sudo modprobe kvm_intel
For AMD Processors
$ sudo modprobe kvm_amd
2) Allow Unprivileged Namespaces
We need to allow unprivileged namespaces so that Docker Desktop runs properly. Set the following kernel parameter using sysctl command.
$ sudo sysctl -w kernel.apparmor_restrict_unprivileged_userns=0
3) Install Docker
The next step is to install Docker. But first, update the package lists and install the requisite dependencies as follows
$ sudo apt update
$ sudo apt install software-properties-common curl apt-transport-https ca-certificates -y
Once the installation is complete, add Docker’s GPG signing key.
$ sudo install -m 0755 -d /etc/apt/keyrings
$ sudo curl -fsSL https://download.docker.com/linux/ubuntu/gpg -o /etc/apt/keyrings/docker.asc
$ sudo chmod a+r /etc/apt/keyrings/docker.asc
Next, add the official Docker’s repository to your system as follows.
$ echo
"deb [arch=$(dpkg --print-architecture) signed-by=/etc/apt/keyrings/docker.asc] https://download.docker.com/linux/ubuntu
$(. /etc/os-release && echo "$VERSION_CODENAME") stable" |
sudo tee /etc/apt/sources.list.d/docker.list > /dev/null
Once the repository is in place, install Docker and other Docker tools as shown.
$ sudo apt install docker-ce docker-ce-cli containerd.io docker-buildx-plugin docker-compose-plugin -y

After successful installation, add the user account to the Docker group using the following commands:
$ sudo usermod -aG docker $USER
$ newgrp docker
To verify that docker is running, execute the following command:
$ sudo systemctl status docker
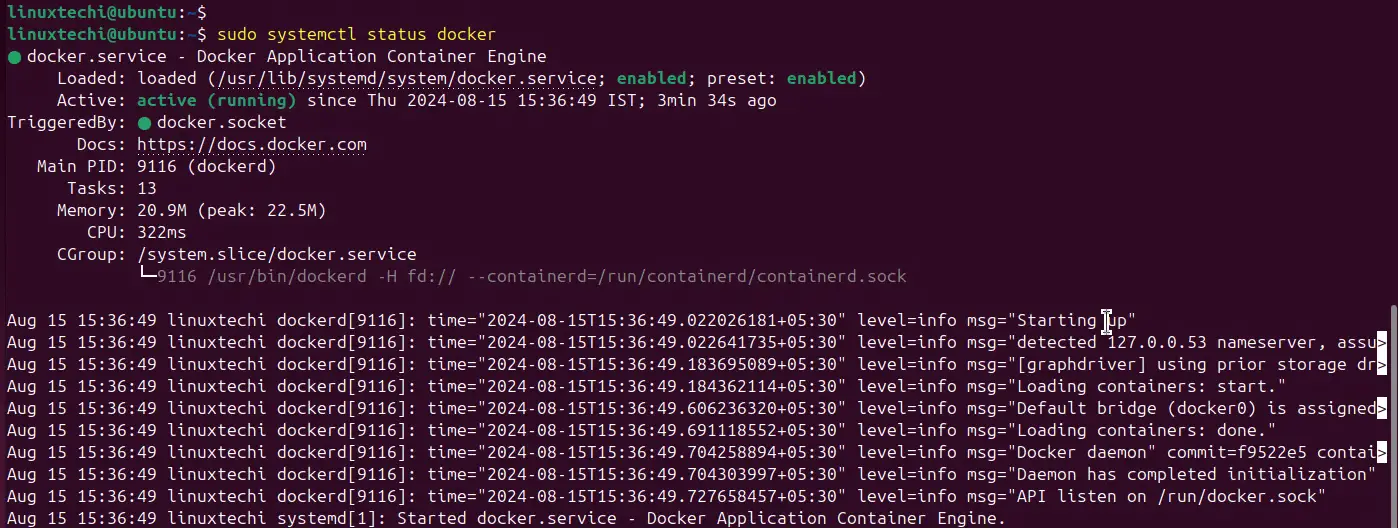
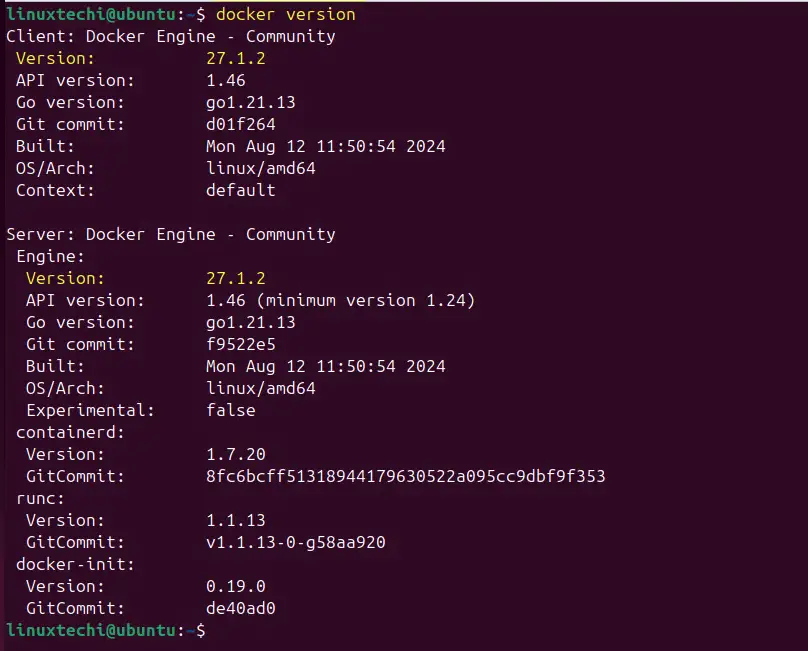
You can also check the version of Docker installed alongside other information as shown.
$ docker version
4) Install Docker Desktop on Ubuntu 24.04
Docker Desktop is not yet available on official Ubuntu repositories or Docker itself. Therefore, you need to manually download the Debian package from the Official Docker website.
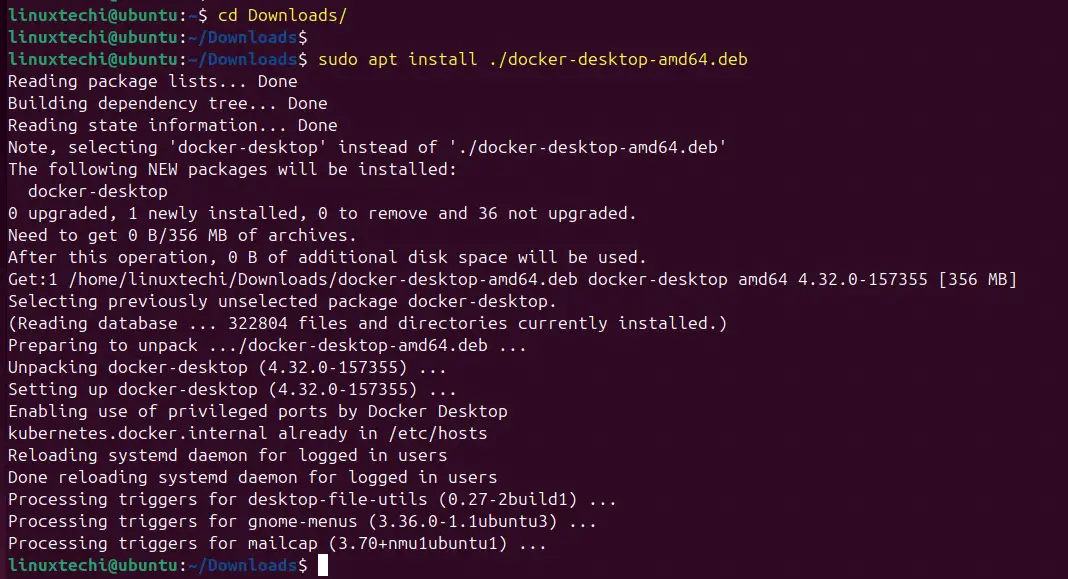
Once the Debian package is downloaded, go to the downloads folder and run below apt command.
$ sudo apt install ./docker-desktop-amd64.deb
5) Launch Docker Desktop
Once Docker Desktop is installed, you can use the application manager to search and launch it as shown.

Once Docker Desktop is launched, the following pop-up will be displayed. Click ‘Accept’ to accept subscription service agreement.

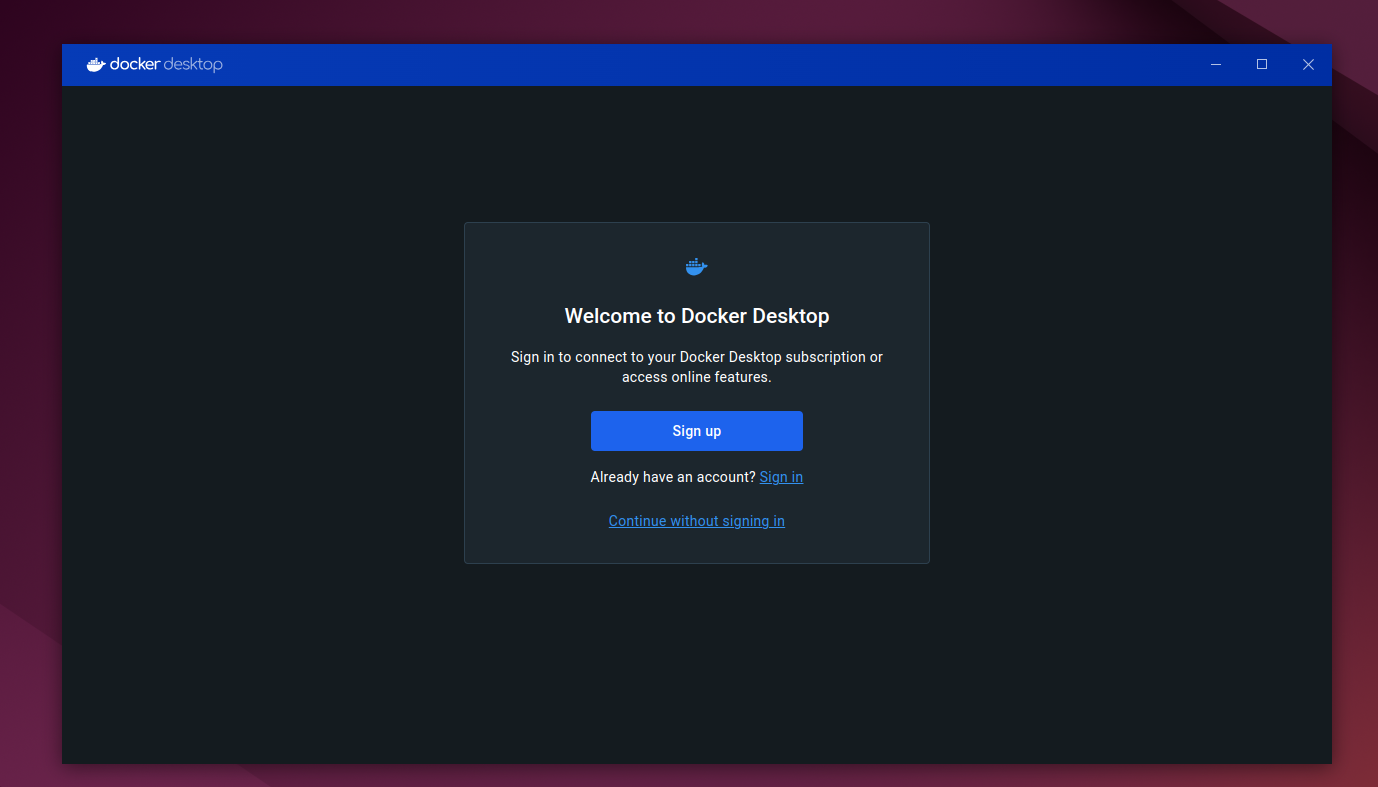
Next, you will get the Welcome screen, If you already have docker desktop account then sign-in, you can also create a new account. If you want to explore docker desktop withou signup then choose “Continue without signing in”
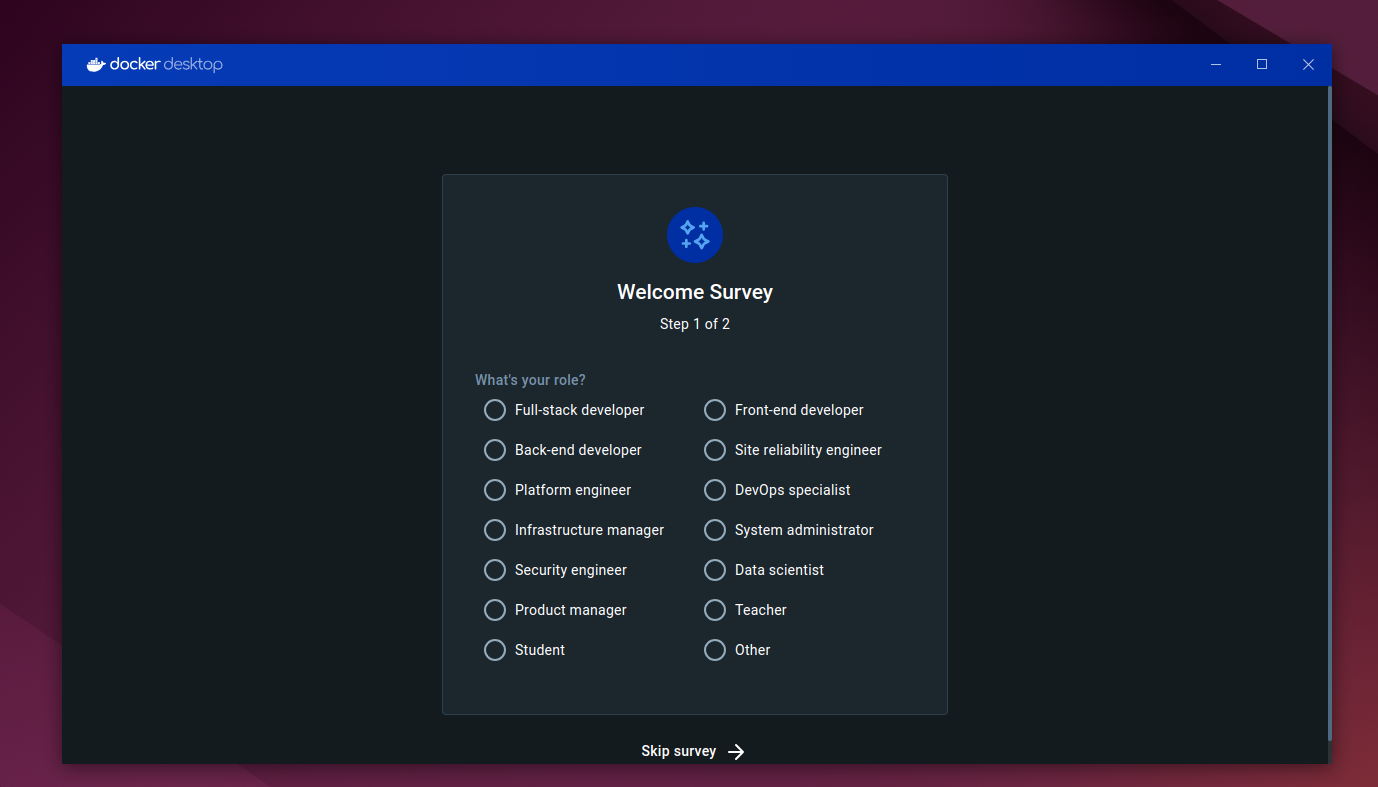
Skip the Survey,
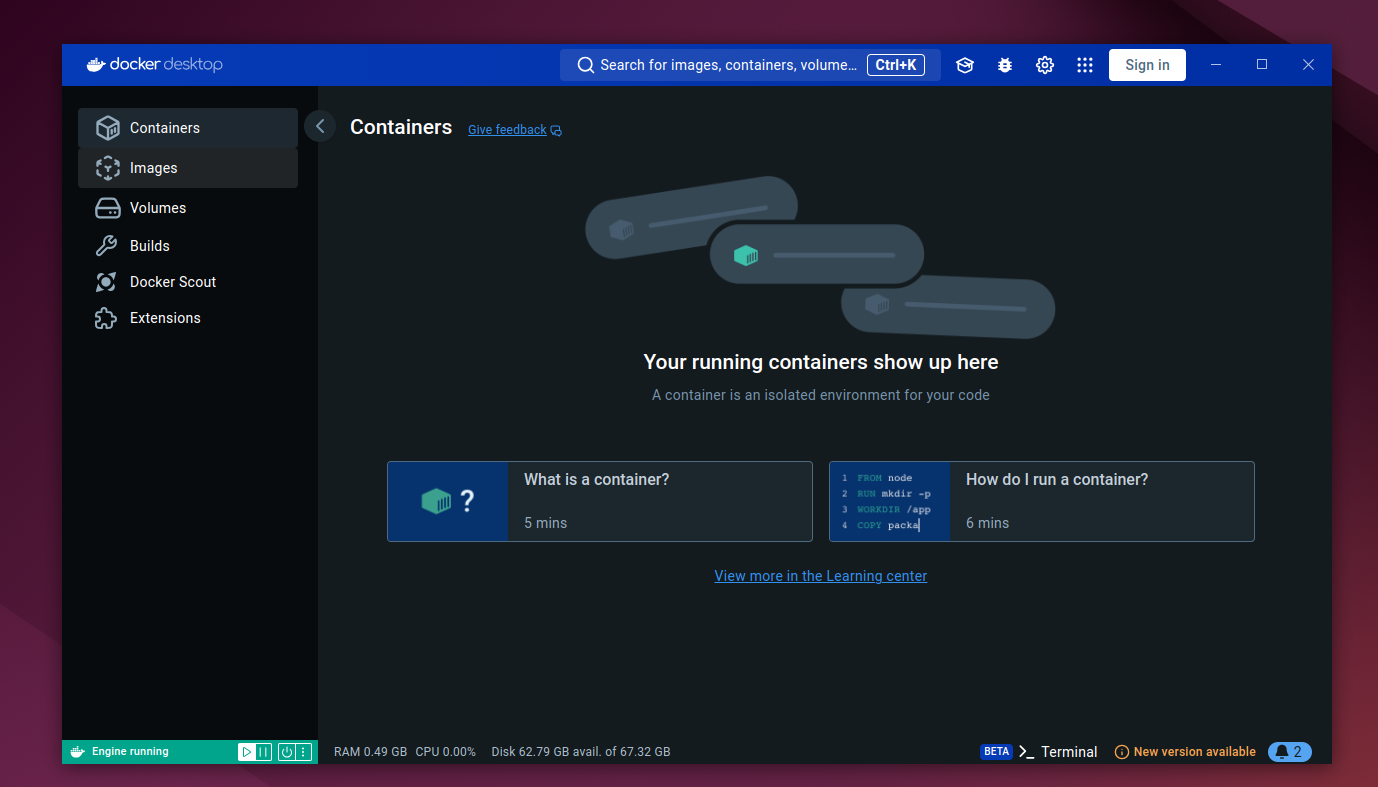
Shortly after, the Docker Desktop GUI dashboard will launch.
6) Configure Docker Desktop
Docker Desktop is highly configurable, and you can tweak almost every setting to suit your preferences.
These settings are grouped into the following:
- General
- Resources
- Docker Engine
- Experimental Features
- Kubernetes
- Software Updates
- Extensions
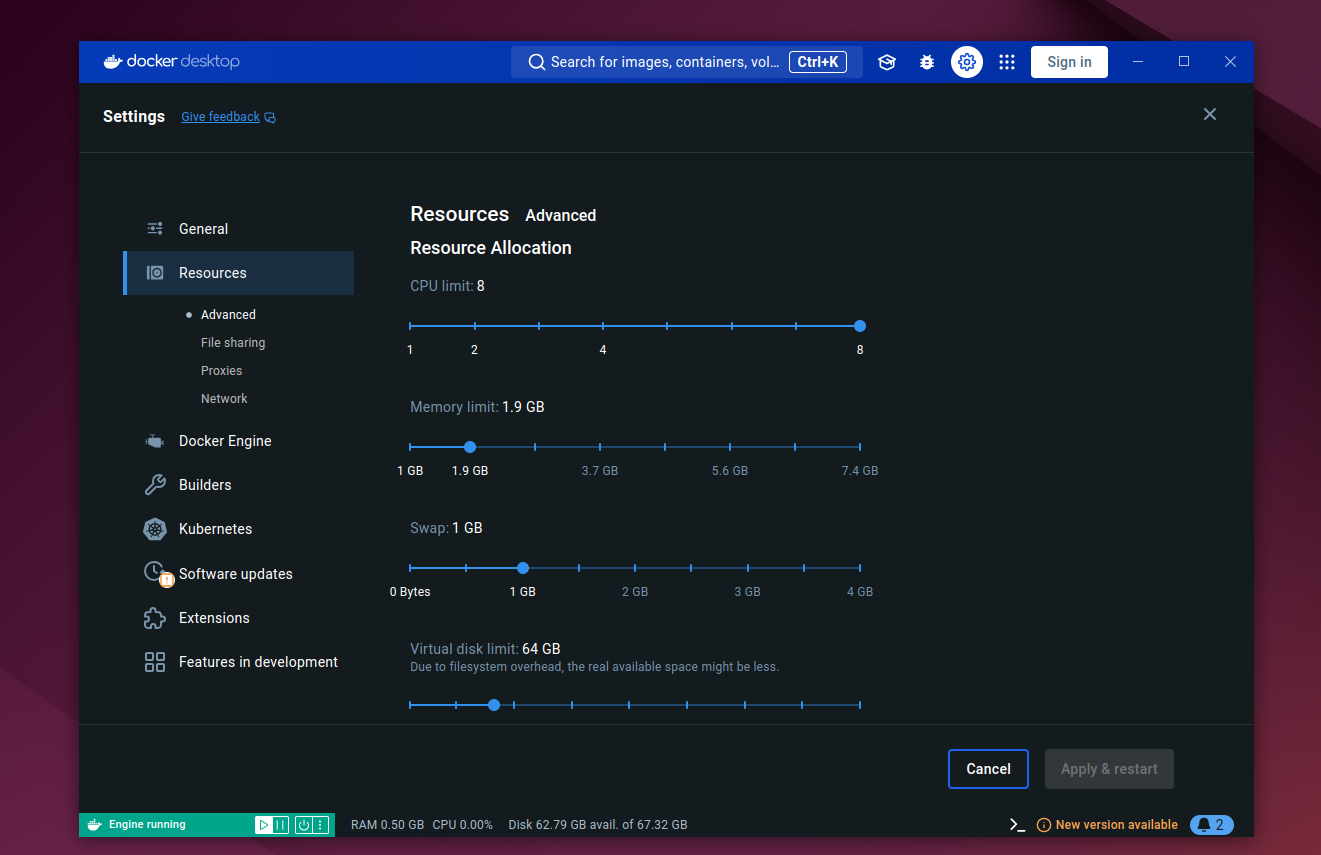
To access these settings, click on the top gear icon and the ‘Settings’ tab will appear with the above-mentioned options.

For example, in the resource tab, you can configure system resources required by Docker Desktop such as No, of CPUs, RAM, Swap space, etc.
7) Running containers with Docker Desktop
To run a sample docker container, follow the screen instructions as shown below,
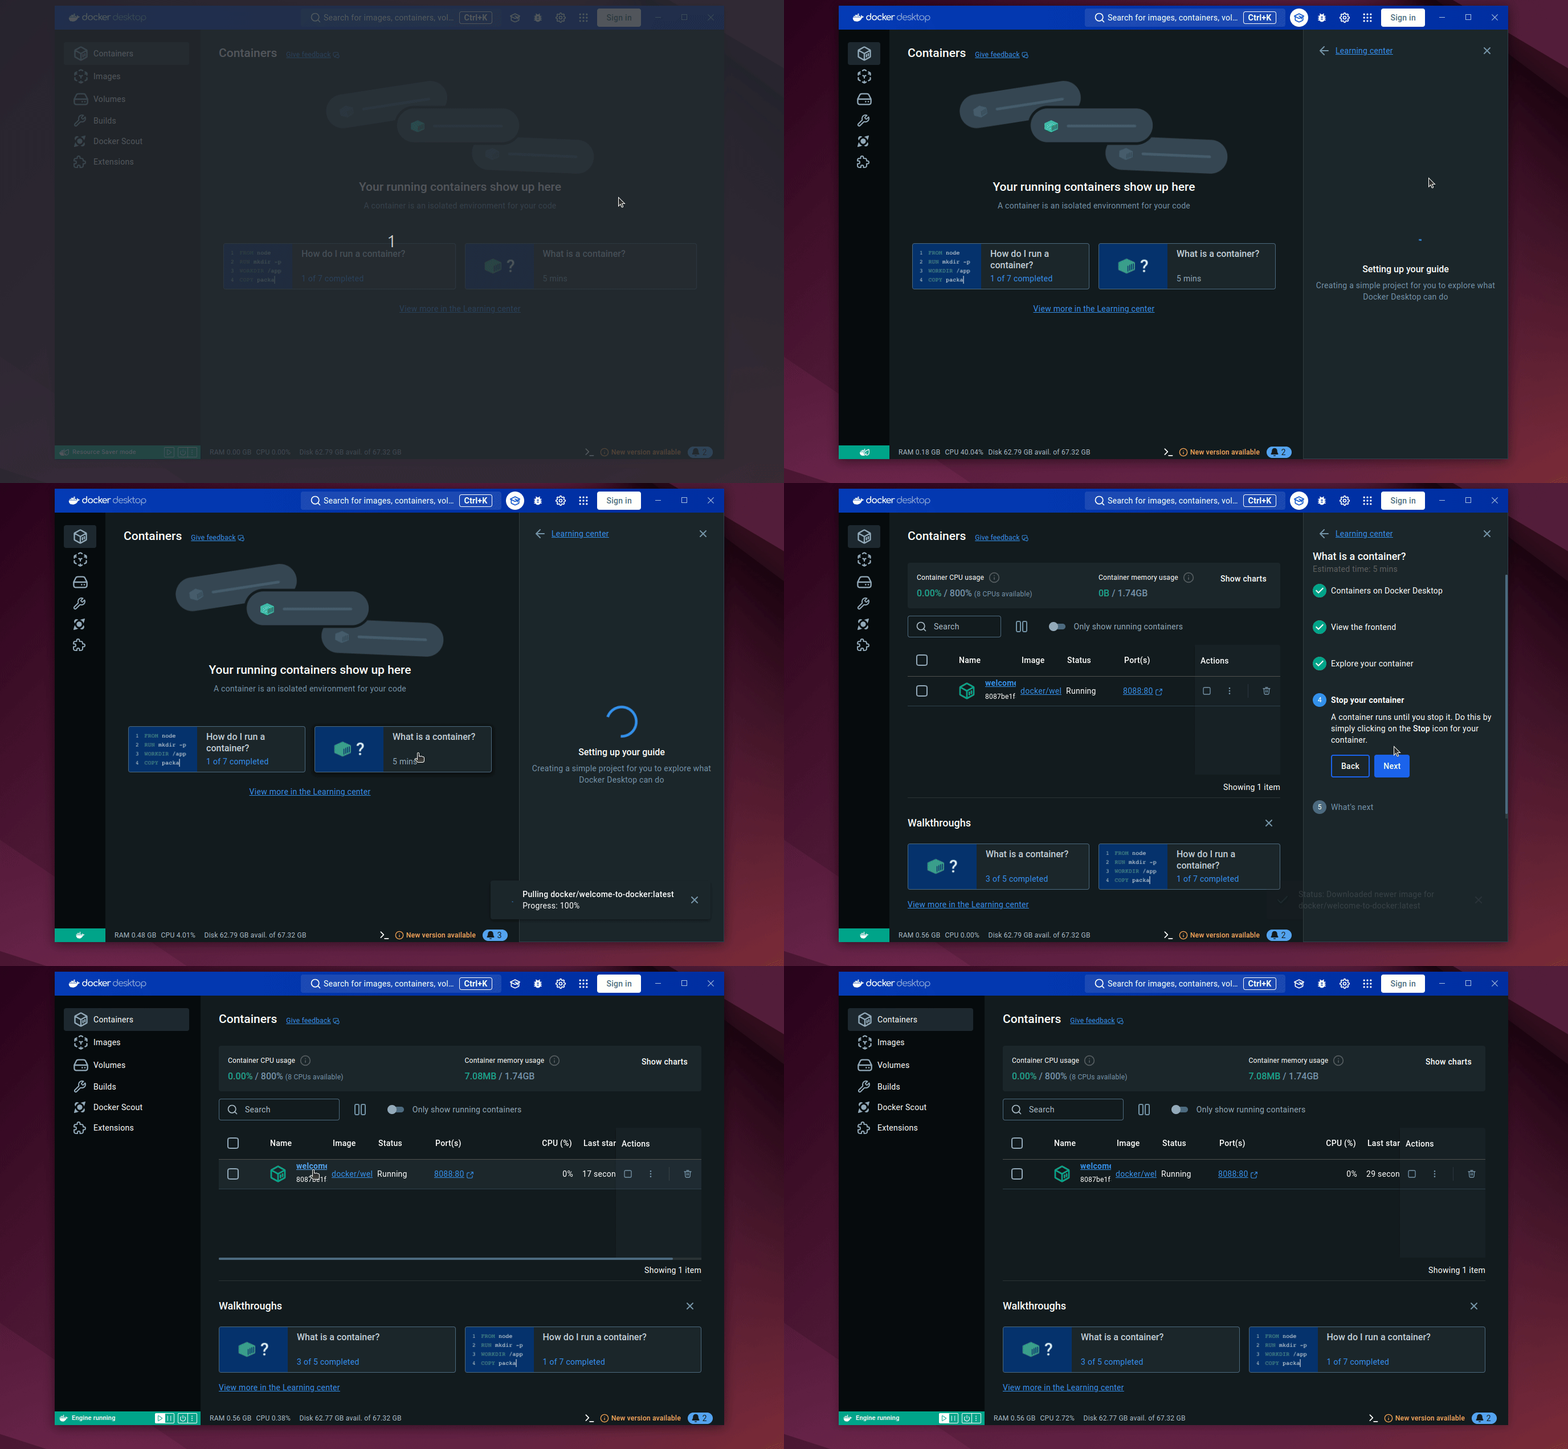
Docker Desktop will start pulling the container image from the Docker hub and create a container instance.
You can click on the ‘Containers’ tab to view and manage all the containers on the system (whether running or stopped). Similarly, you can click on the ‘Images’ tab to view and manage pulled container images.
8) Uninstalling Docker Desktop
If you no longer need Docker Desktop on your system, you can uninstall it using the following command.
$ sudo apt purge docker-desktop -y
The remove the associated Docker Desktop files.
$ rm -r $HOME/.docker/desktop
Final Words
In this guide, we walked you through the installation of Docker Desktop and demonstrated the basics of how you can get started and start creating and managing container images. Your feedback on this guide will be appreciated.
Also Read: 20 Useful Docker Command Examples in Linux
